Monday 15 December 2014

Masks and Durlston - the exhibition!

For those who have followed my blog, you may remember a few months ago I did a short course in model making to learn more and gain more practical experience in props making - one of the outcomes of which was designing and making an ornamental fibre glass resin mask, with copper powder in the surface resin to make it look like antique copper when polished.

 The edges have been filed since this photo was taken and all tidied up!

Well, I had an email from the University, and I am delighted to announce that as of Sunday this mask is being exhibited at Durlston Country Park as part of the Arts University Bournemouths Short Courses exhibition of work from previous students. For anyone who goes to the exhibition, this mask is on a plinth with another mask which I believe was made by someone in the same class as me! It is also being exhibited for sale, which is a bit of a moment for me as while I do want to sell it, it is the first mask I have made out of resin and I am tremendiously proud of it, so it will be a bit sad to see it go.

Monday 8 December 2014

The Nutcracker - Final fittings and away they go!

Today were the final fittings of the Nutracker and Mouse King masks, and thankfully all was finished by the end of the session to be handed over with the first performances on Friday!
There were a few modifications to be made - in the last fitting, the Mouse King mask was loose and had been slipping, then when immobile the chin strap had been digging in the dancers throat. For todays fitting I brought elastic to replace the inflexible chin straps, and then when the mask proved  less immobile I added a small over head strap in black to the very front of the top of the head. This added stability to the mask when performing the routine and meant the performer was more comfortable.


The Nutcracker mask was actually perfect the way it was. I left the top of the helmet mesh instead of covering it with the gauze so that the dancers head wouldn't get too hot, as particularly under stage lights I know that when you're wearing a mask the top of your head can get very hot and it helps to have ventilation

I found that mix of acrylic paint and glue recommended on the websites that I checked did work well but required multiple layers - though applying the paint to large areas of the mesh was a lot more difficult and required a lot more layers!

Making the chain from braid was actually a lot easier then anticipated, though quite fiddly and time consuming. I used very small pieces of gold gaffer tape to secure the 'links' in place, then used a glue gun to secure the braid to the mask. I usually avoid using a glue gun unless absolutely necessary but in this case, with the varaform being a plastic, the glue effectively being a plastic, it fused the braid to the helmet nicely. For the gold ball on top of the helmet, I found the best way to acomplish this without making the mask more top heavy at the front was actually by using a polystyrene ball, and a mix of gold acrylic and glue to paint it.


Now that the masks are finished and the performers have them, everything is on track for the first performances this Saturday and Sunday opening at the Electric Theatre in Guildford. For more information on the performances see the company's website http://www.lets-all-dance.co.uk/nutcracker/

Tuesday 2 December 2014

Fittings and Progress!

Last week were the first fittings with the Lets All Dance ballet performers in Greenwich for the Nutcracker masks!

On arrival, after checking the fit of the masks performers ran through part of the ballet in them to check the stability and comfort during performance. Thankfully the nutcracker, aside from the nose needing widening and needing to be brought up around the shoulder area for comfort, was quite stable during performance and now just needs finishing.
The Mouse King mask was very stable when in the right position on the head, but the straps were an issue and need replacing with flesh coloured elastic.

The biggest task post fitting was to finish the helmet of the Nutcracker mask. For this I am using the varaform gauze, which is harder to use then the mesh but gives the flat smooth surface that the helmet requires. I have found that the gauze can be fused and manipulated by using a hair drier, which actually makes it much easier to manoeuvre then submerging it. Here is the mask with the alterations done and the helmet on! The next thing to do is to put the top on the helmet, decorate and add the 'teeth' and beard. The decoration will include adding the gold pattern to the front of the helmet, and the gold 'chain' made from gold braid.
The Mouse King, other then the straps being changed for elastic the rest is purely cosmetic. Through researching online it seems the best thing to paint varaform with is acrylic mixed with glue, very much the same as painting plastazote. I now have less then a week left until the final fitting when, hopefully, the masks will be finished and no more alterations will be needed and they can be given over to the company at the end of the fitting.

Thursday 20 November 2014

Masks, Ballet and the Mouse King!

Earlier this month I was delighted to be asked make two masks for an upcoming ballet of the Nutcracker, being performed in London for children and young audiences. The ballet company is Lets All Dance (www.lets-all-dance.co.uk) founded by Orit Sutton, specialised in dance classes and in 2013 produced their first professional show 'The Princess and the Frog' which toured England to more then 3000 children, parents and teachers.
I have been asked to make the Nutcracker and Mouse King masks, a challenge since this is a two person ballet and involves a lot of quick changes, so there are some very specific requirements to take into account - the main one being that the masks cannot touch the dancers faces and must affect their makeup and hair as little as possible. They also must be light and have as much visibility as possible whilst looking visually impressive.
After discussion with the founder of Lets All Dance, Orit Sutton, it was decided that Varaform would be the best material to use. At University, I saw varaform used but haven't used it before myself, so this was a new experience for me.
The first thing that I learnt, unfortunately the hard way, was that when you are using a large piece of varaform, the only way to soften the plastic infused cotton if you don't have a heat gun is to submerge it in 70 degree+ water, at which point if you cant sustain the temperature of the water you have to take it out and work fast to form it before it hardens again, or folds over on itself and fuses. Using gloves also doesn't work as the varaform can fuse to the gloves, so it was a time of very sore fingers for a bit!
The Mouse King!
The first stage of making this mask was to create a master form to mould it over. For this I used tin foil, reasoning that the plastic wouldn't stick to it and that the foil could be compressed to remove it from inside the mask. For the main bulk of the mask I used varaform light mesh

After submerging the varaform in hot water I quickly moulded it around the master and it set within a couple of minutes. Below is the mask after the foil was removed!

For the crown I decided to use varaform gauze, which is cotton gauze impregnated with plastic. This was much stiffer and less stable when moulded then the mesh. It also does not fuse as well to the mesh as the mesh does to itself. I cut out the basic crown shape, submerged it as I did with the mesh and fastened it to the 'forehead' of the mouse face.

When I was a student, an art supplier would come to the campus to sell discounted art supplies, and on one of those occasions, with a few pounds to spare, I bought some gold metal leaf, thinking at some point I would need some and it would be good to get some in preparation. That was over two years ago, and finally this was my first chance to use it! Despite saying that it requires a special adhesive, I have found that strong PVA actually works very well. This is the stage the mask is currently at, and tomorrow once the glue has a chance to set properly, I am going to layer a coat of glue over the crown to make sure that the leaf holds.


To make the mask secure on the head and to keep the mask away from the face, the best way that I have come up with is to use a similar technique to the one used by the 'Breathe' team when making the hats and headdresses for the performers - namely using a dismantled bicycle helmet cut apart to form a 'crown' going in a band around the head. This will hopefully reduce the impact on the hair, make it a secure fit and hold the mask securely away from the face.

I hope to use the same technique on the interior of the Nutcracker mask.

Monday 22 September 2014

Landance at the Valley of Stones!

Over the last few weeks I have been working as the Visuals Assistant for Landance under designer Ella Huhne, an associate event of the Inside Out Festival Dorset. Last night was the final show and after an incredibly busy show week I finally have time to write about it!


In the Valley of Stones, which is in the triangle between Bridport, Dorchester and Abbotsbury, there is a circle of stones, and in a promenade performance that took the audience down the valley to the circle Landance, a company made up of 5 professional dancers (Impermanence Theatre, Bristol) and two community dancers, took us into a world of their own devising, through contemporary dance in the landscape based on their reactions to the site. Thankfully the main panic issue that plagues all outdoor performances - namely the weather - was in no way a problem for us as aside from some very atmospheric fog the weather was sunny with a cool breeze to stop it from being too hot.

 
Primarily I was there to assist Ella in whatever needed doing, but in terms of the visuals aspect from what I was involved in was mainly assisting Ella with anything that needed doing, and helping with the biggest visual aspect - and I do mean in terms of size as it was a 16x16m circle of organza shot through with metal threads! This was created using over 100m of the fabric in lengths, sewn together by the costumer and her assistant. The fabric itself is incredible, it looks like water on the ground but is translucent so when lifted or when the performers interacted with it, you could see them through it and it created a spectacular effect.

In the two days of performances my main role was to set the fabric before the shows and assist with any issues that arose, including but not limited to helping the stewards, patching the fabric, assisting people with mobility issues, assisting building a tent and packing it down again and minding sound equipment. It was an incredibly busy couple of days but was a roaring success.

Monday 8 September 2014

THE SHOW! Remix Gold - 'Touched'

THE SHOW
Last Friday it was on to the Southbank Centre in London for three performances for the Southbank Centre's 'Unlimited' festival! We were given two dressing rooms, and I based myself in the ladies dressing room (for anyone wondering, the Southbank Centre has incredibly nice dressing rooms and was absolutely lovely to us in my limited contact with them)
I arrived a half hour before the cast was expected in order to meet with Alice and Claire, the organisers and masterminds of the performance, and as I arrived was able to see the crew setting up the stage under the Hungerford bridge. After being taken up to the dressing room I got to spend a good amount of time up there by myself setting up the space - putting the costumes on rails, setting out the gloves and shoes in sections for the performers to be based in, laying out the hair products and make-up that I was providing (though many of the cast were bringing there own as a matter of personal preference in the colours that I had requested )
After the cast arrived, they needed a run out of costume, but we realised that once they had had their run through we would only have just over 10 minutes before they would need to go down for the first show, so with the assistance of Alice and the company carers we started getting them in as much of their make-up as we could (leaving off anything that would be smudged by putting on the costumes) and those who's hair we could before they went for their run. After the cast went down I went on a quick run for spares - you can never have enough make-up wipes or spare make-up! - then it was back up to the dressing rooms to get everyone in costume and ready. Just before the run our interpreter had arrived and so I got to see her in costume for the first time and it fit! Not only that but seeing them all together was a treat, as while all the costumes were different, they all gelled into a cohesive unit of 1950's style meets modern day.


Audience reaction at the end of the final show - if you look you can see part of where they all were standing on the bridge above to watch as well!
So without further ado, it was time to go down for the first show! There was a slightly longer gap between the first and second shows then there was before the last, allowing the performers to get out of costume for a short while to have lunch and then to get back into costume and make-up, and for me to re-do their hair, and the shows were a great success.

During the final show there was a minor software glitch that meant that one of the dance numbers got cut short, so they decided that they would do the dance number again as an encore at the end. This also meant that for the first time the wings were visible when the performer was mobile rather then sitting in the hoop at the end of the show.

Working with Remix Gold really was an incredible experience. Going from recieving the brief to designing the costumes to making, sourcing and adapting the costumes in the space of a month has been an incredible experience, and now the show is done in its first set of performances! Next Remix Gold are performing 'Touched' at the weekend for the Inside Out festival, so if you're in the area go down and take a look!

Sunday 7 September 2014

SHOW PREP! Remix Gold - 'Touched'

THE COMPANY
Remix Gold is the older branch of Diverse City's youth performance group Remix. The performance, comprised of 6 young performers and an interpreter, was held at the Southbank Centre as part of there 'Unlimited' festival to celebrate disabled artists and performers.
I was taken on just over a month ago as their costume designer and it has been an incredibly busy month!
This show has been an incredible one to work on - and now that it was performed on Friday, I finally have time to write about it in detail!


FINAL REHEARSALS
The final rehearsals and fittings at lighthouse went very well, with a dress run and as a twist I had been asked if I could also come on the performance day and do hair and make-up!That made this not only the first and last time for me to see the cast rehearse in costume, but also my last chance before the show day to practice 1950's hairstyles on the cast!


HAIR
I had been looking at a young, Grease meets Summer Holiday look for the hair, and had planned to do quiffs on both of the longer haired girls but unfortunately one of their fringes was too short to allow for a quiff, so for her I used a combination of twisting locks into curls flat to her head to pull her hair back from her face and neck. For the girl with the longer fringe I decided on a quiff and pony tail combination. Our last female cast member had a short bob and so I decided it would work best if her hair was curled with a hair clip of either feathers or a flower to hold her hair back from her face.

THE COSTUMES
With a relatively small amount of time to source, make and alter the costumes, I decided to source and alter all I could to give me enough time to alter and embelish all of them to a standard that I was happy with. This I was very sucessful with as I managed to source all but one of the female performers skirts. The costumes were all, with the exception of our interpreter, embellished with rhinestones to give them a touch of glamour that the company were keen to have and to help tie the costumes together. I also used rhinestones in the place of accessories as, for the aerial aspects of the performance it was important to have nothing on the costumes that could risk snagging and pottentially injuring the performers.

For the two of the male members of the cast, I used red and black rhinestones on one to create the appearance of a belt on the waistband of his trousers, and on the other I used lines of black rhinestones on his shirt to give the appearance of braces. The braces in particular I felt were visually effective, though I did have a problem on show day as there was a slight finish on the shirt that made the rhinestones more inclined to come off, thankfully not noticably and I was able to re-attach them in the breaks between shows.
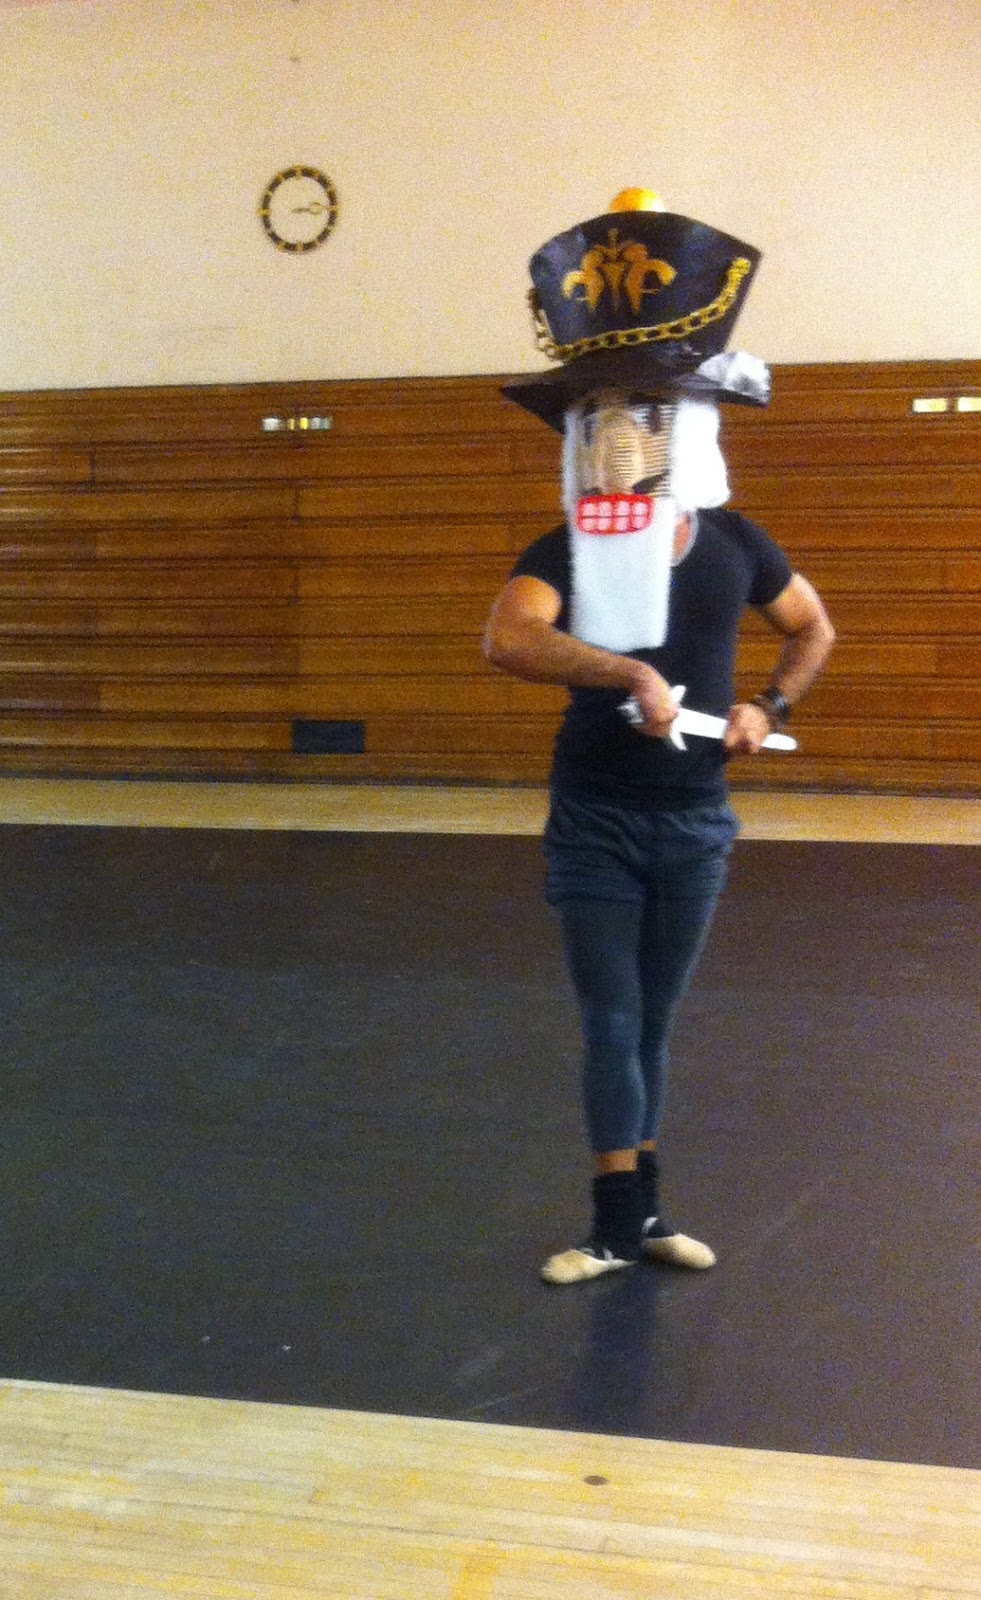
For our third male performer, who the performance is based around, we wanted him to look smart, mature, separate but still a part of the cohesive look. Inially the idea was for him to look a little like a 1950's detective, but with the performers mobility aids this took shape in the form of a smart blue shirt and trousers. The trousers needed to be tracksuit/leisure trousers but look like smart trousers. I found a good pair of elasticated waistband black trousers in M&S, then pressed the fronts so that they looked like smart trousers, which was surprisingly effective. I had initially thought to use a striped trilby hat, but decided, and the team agreed, to not use it as a lot of the audience wouldn't be able to see his face.

On the ladies costumes, the rhinestones were much more pronounced. With the performer in a black skirt and red shirt, I used a thick band of red rhinestones around the waist to create the appearance of a belt, and a thin line of black rhinestones around the collar of her red shirt to give it definition and a bit of a subtle sparkle. The black skirt was a sourced long black circle skirt that, due to the acrobatic nature of the performance needed to be shortened so that there would be less risk of it tangling in her legs. the red shirt was originally long with long sleeves, and slightly loose. I shortened the shirt after marking its length during the first fittings, then removed the sleeves and took in the shirt so that it would not ride up during the performance and preserve the modesty of the performer.


With our performer in the orange skirt and black shirt, I had some issues in sourcing an orange skirt as they are incredibly difficult to find, so this is the only costume piece I fully made, using a poodle skirt pattern and then shortening it from the waistband once it was done. To the waistband of the orange skirt I added a loose pattern of black rhinestones for a bit of interest and subtle sparkle, and to the black shirt I covered the entirety of the collar in orange rhinestones. These I was especially happy with as the orange rhinestones in particular are incredibly bright, especially on black. The black skirt was a sourced stretch shirt, which came with the problem of the top button hole being slightly too wide giving it a tendency to pop open, so after establishing that the performer could pull the shirt on over her head when it was done up with no dificulty, I stitched up the front of the shirt so that it was secure.


For our performer in the yellow dress, who was a major focal point in the production, there were some very specific requirements. A removable back pannel was needed in her dress, to come off during the production to reveal a pair of wings. Thanks to some advice from Kate McStraw, an incredibly tallented costumer who very kindly helped me with one of the fittings, I used power net sewn to the dress to create the look of bare skin to paint the wings on to, as the production team had originally requested that the wings be painted directly onto her back. The dress I sourced was originally a 1950's style wraparound dress, but due to the acrobatics of the performance and the height of the performer there were some extensive alterations to be done! I began by shortening the dress after marking the required length in fittings, then stitched up a section of the skirt, removing the excess wraparound fabric so that the skirt was a single piece, though left open for 6 inches from the waist down to allow her to take it on and off easily. I then added snap fasteners to the front of the dress and the front of the skirt down to the stitched section of skirt. During the fittings I had marked out the size and shape of the back pannel to be removed, and I cut that section out, folding and stitching it to prevent it from fraying, then to the removed pannel I made a piece of bias binding out of the band of removed skirt from where I had shortened it, to widen it so that it would fit over the removed section of the dress. I put in a pannel of power net, and then took it to the final fittings and dress rehearsal.

Dress rehearsal at Lighthouse Theatre, Poole
From watching the dress rehearsal I saw that as the power net was stretchy, the pannel was coming out too big and ruckling when the performer moved, so in the two days before the dress run I tightened the pannel of fabric, and using pearlescent silver, blue, white and silver glitter fabric paints, and outlining in black fabric pen, I added the wings. I had gotten 3 different shades of gold rhinestones, with two colours of 4mm width and the more yellow gold ones at 3mm, and attached them around the collar, down the front of the bodice and then round the waist connecting again at the back. In adding the pannel over the wings, I put in snap fasteners, surrounding them with more rhinestones so that when the pannel was removed the snap fasteners would blend in with the rhinestones

For the three acrobatic performers, there was the additional part of shortening all of their shorts, as during the dress rehearsal, the bottoms of the shorts were visible.
For four of the performers, two of the male performers and two of the ladies, had gloves, all of which needed rhinestones put on the backs of them, an added point of interest on the costumes and emphasising the hands which the company especially wanted.

The reason I dont mention the costume of the interpreter until its nearly the performance day is that I only met her once before the show itself - she was a last minute addition and couldn't make the final dress run for a fitting, and so I found and ordered a suitable dress online in two sizes so that I could make sure the she had a dress that fitted, being only able to try them on her on the performance day itself and the other dress being returned to the retailer!

ON TO THE SOUTHBANK CENTRE!

Friday 29 August 2014

Designing again! RemixGold

I am delighted to announce that the reason for my neglect of my blog (apologies) is that a very exciting job has come up that has taken over the last month almost entirely! I am now costume designer and maker for a circus/contemporary dance piece with a cast of 7 being performed by Remix Gold on South bank in a weeks time!
Bit of background info on the company, Remix Gold is an offshoot of Remix, which is an offshoot of the larger company of Diverse City! See the links at the end for more details on the show and the larger company!

It has been an incredibly fast turn around and definitely the tightest deadline I have faced as a designer before, going from starting designing to first fittings in 3 weeks! After a long discussion with the Director of the new, devised piece, I decided to keep the costumes relatively simple, striking 1940's/50's style of teenage rockers with a lot of colour semiotics.
While I have done carnival costumes and a lot of theatre and outdoor performance, circus is somewhat new to me so there were a lot of new considerations to take into account - not least of which being the risk of costumes catching on apparatus which could be disastrous! With this in mind, while still maintaining the look the costumes had to have the bare minimum of extras attached. Also, something the cast in particular was very keen on was a glamour to the costumes. With this in mind, I decided to use rhinestones to create the look of the accessories you would expect to see on clothes of the period, giving it some sparkle and glamour, preserving the look and making sure that the costumes are as safe as possible.
More info to follow!

Tuesday 1 July 2014

Model/Props Making - Final session!

This session was my final chance to cast from my mould and work on the rest of my pieces from the short course.
 
I started the session with casting in latex and expanding foam! This is something I was incredibly interested in doing with my mould as I wanted to try and create a prosthetic style mask with enough rigidity to hold its form and be able to last for a run of performances.
To start, I used a small amount of liquid latex (after spilling a fair bit down myself) to put a two thin coats of liquid latex inside the mould, drying it under the hand drier between coats. After covering a board to go over the mould in a thin layer of vaseline to stop the foam from sticking, I then had to mix the expanding foam. This was a fascinating process but had to be done incredibly quickly and so I did not manage to get any photos unfortunately. To make the expanding foam mix I had to use a two to one ratio of the foam to the catalyst, I then had about 8 seconds to mix it thoroughly before pouring it into mould and covering it with the board.
 
 
I then went back to the fibre glass version while I waited for the expanding foam to propperly set - while it is very fast I wanted to use all the time in the session to get as much as I possibly could done.
 
 
In going back to the fibre glass version, I got the chance to use my new favourite piece of workshop equiptment - the industrual sander! With this I managed to get all the edges sanded down beautifully in just 10 minutes, with the exception of a couple of interior sections that need cutting out. After this I got some wire wool and buffed the rest of the surface.


 Here it is in the sun, buffed and polished and held up against the wall in the sunlight (the photo has come up dark because of the glare coming off the shinier parts and the camera compensating for it) you can still see a lot of the detailing though despite the glare, and more so on the photo below!


 And here they are together - the copper fibre glass version and the silicone version! Just after this photo I cut out the eye holes and scooped a face shape out of the back, it needs tidying and painting before it can be propperly worn, but overall pretty proud of it and not a bad start to props and model making all in all!
 

Wednesday 25 June 2014

Model/Prop Making - Casting Session 1!

Todays session was de-moulding and casting in fibre glass!

At the beginning of the session I took the master out the mould and cleaned the inside of the silicone to get rid of any embedded bits of clay in the detailing.


FROM HERE ON OUT GLOVES AND A MASK WERE DEFINITELY REQUIRED!!! The combination of fumes and metal powder are not good for the lungs! The next stage was to brush metal powder around the inside of the mould - I chose copper as I thought the warmer colour would suit the design. When finished this can be buffed into a shiny finish, not much is needed and too much can cause a powdery outside - not desirable! Then it was time to add the first coat - a gel coat that is enough of the gel to provide a decent coat with 2% catalyst added, and into this I added some of the copper powder (about a tea spoon) and a tiny bit of green pigment so that when polished it would have an antique copper effect.

Here it is with the gel coat!
 

 From here the next step was using fibre glass tissue, cutting it into pieces and small strips and putting the gel onto it - the gel started to break down the tissue and softened the fibre glass until it was maleable enough to stick to the gel coat. The job of the fibre glass is basically to reinforce the gel coat.

 
Here it is, after being de-moulded before any polishing and before the fibre glass edges had been sanded. For the last bit of the session I got some wire wool and managed to buff a couple of sections and below are the results on one of the acorns and a small section around it. 


Tuesday 17 June 2014

Model/Props - Mouldmaking!

After an incredibly busy couple of weeks I'm back to write up the last two of my sessions!
 
Today was my last day to get my master finished, and to start making the mould in preparation for the first cast!

 
 After finishing the detailing on the leaves, I decided to add leaf 'veins' into the face to make it more of an integration between the human and plant aspects. And so here we come to the finished head!


I have to say the acorns are some of my favourite parts.

 
 After finally finishing the master, I built a 'wall' of clay around it leaving a rough 2 inch gap, then covered it in silicone with a catalyst.

 
After covering the master, while waiting for it to set I decided to do a little more work on my gun but unfortunately ran out of time on that before I could do much and needed to go back to mouldmaking but here it is!

 
I've gotten some of the marks put in place on both sides, and I hope to mark into it with a soldering iron.  BUT then back on to the mould making, as the solicone was dry I had enough time to cover the mould in a layer of thick plaster before the end of the session - next session will be time to take the master out the mould and see how its come out.

Tuesday 10 June 2014

Model/Props - Casting and Costume props!

After discussing turning my master into a prosthetic like mask and casting in silicone, I started working in this session to extend the face down the 'neck' and to continue with the objective of finishing the surface detailing!
 
                                          At end of previous session                     Starting to add more surface detail

Extending to go down the 'neck'


I added more acorns as well as the additional different types of leaves for more variety. In order to get the details on the leaves correct I used research images to check the patterning.
 
Adding more detail to the surface using a silicone modeling tool. I find this gives a smoother line.


All but two of the leaves now have their surface details, and next session I will be covering the master in silicone and forming the mould, which I hope to cast in both silicone and fibre glass.